Learn how to manage and pay your bills in online banking
Step 1: Go to the Bill Payments tab

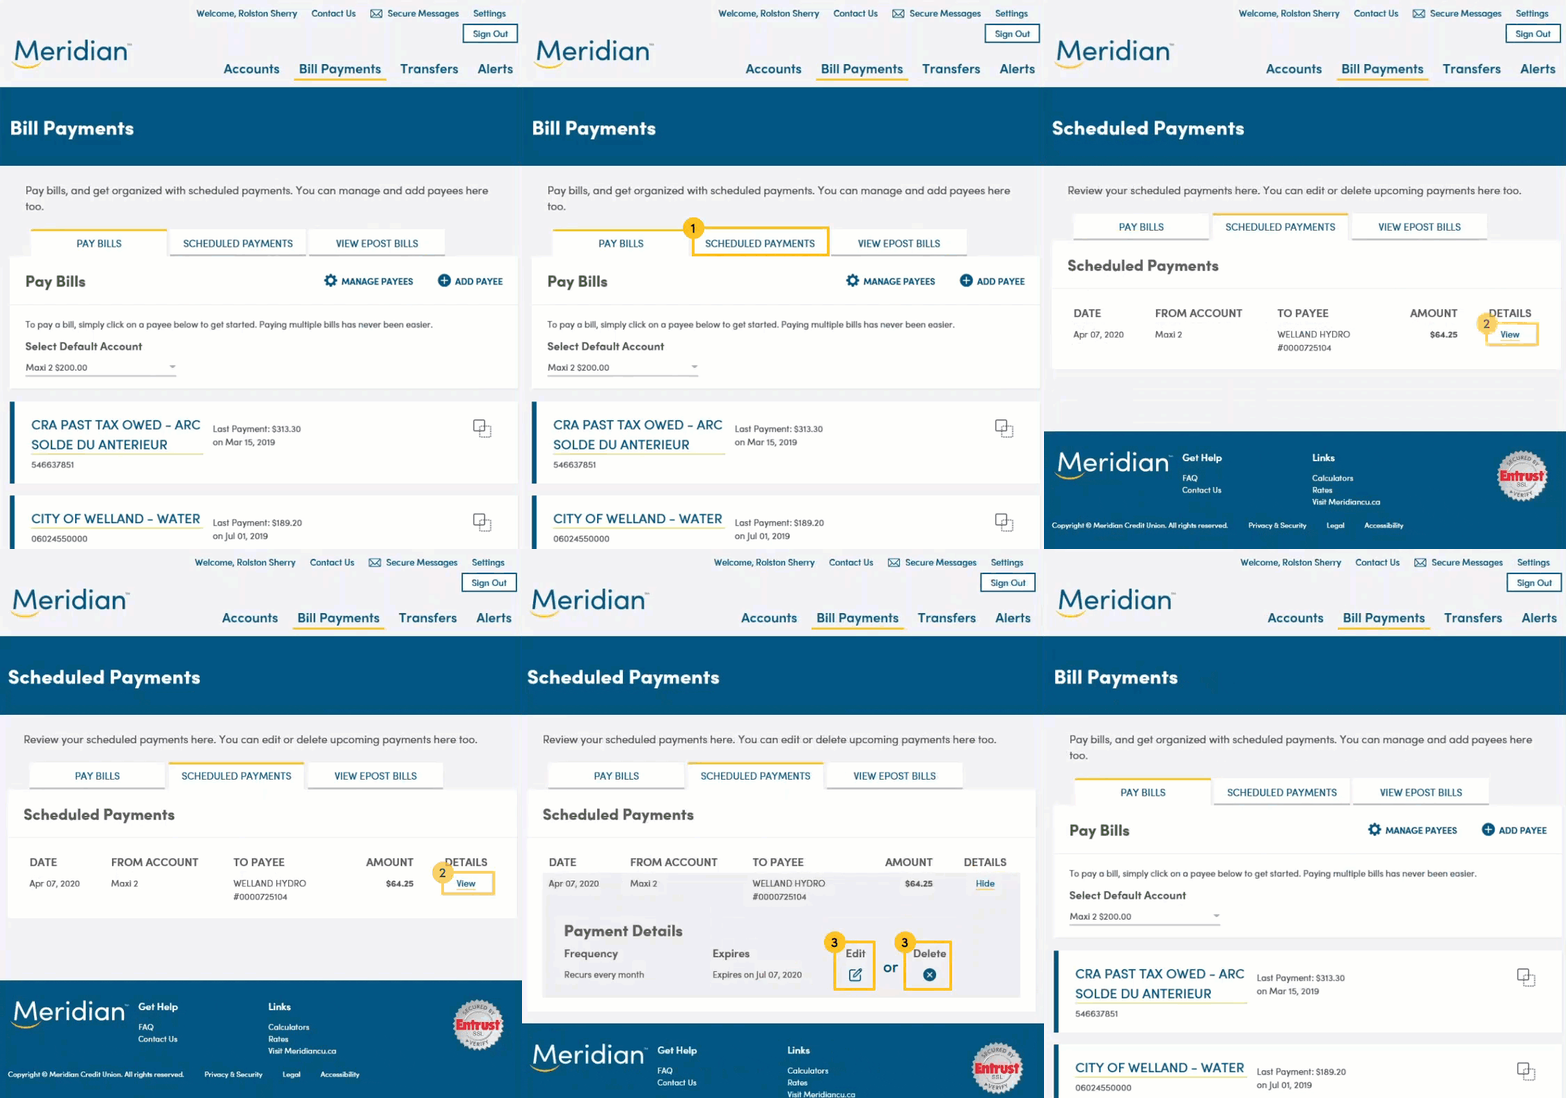
Once you have signed in to online banking, click the Bill Payments tab.
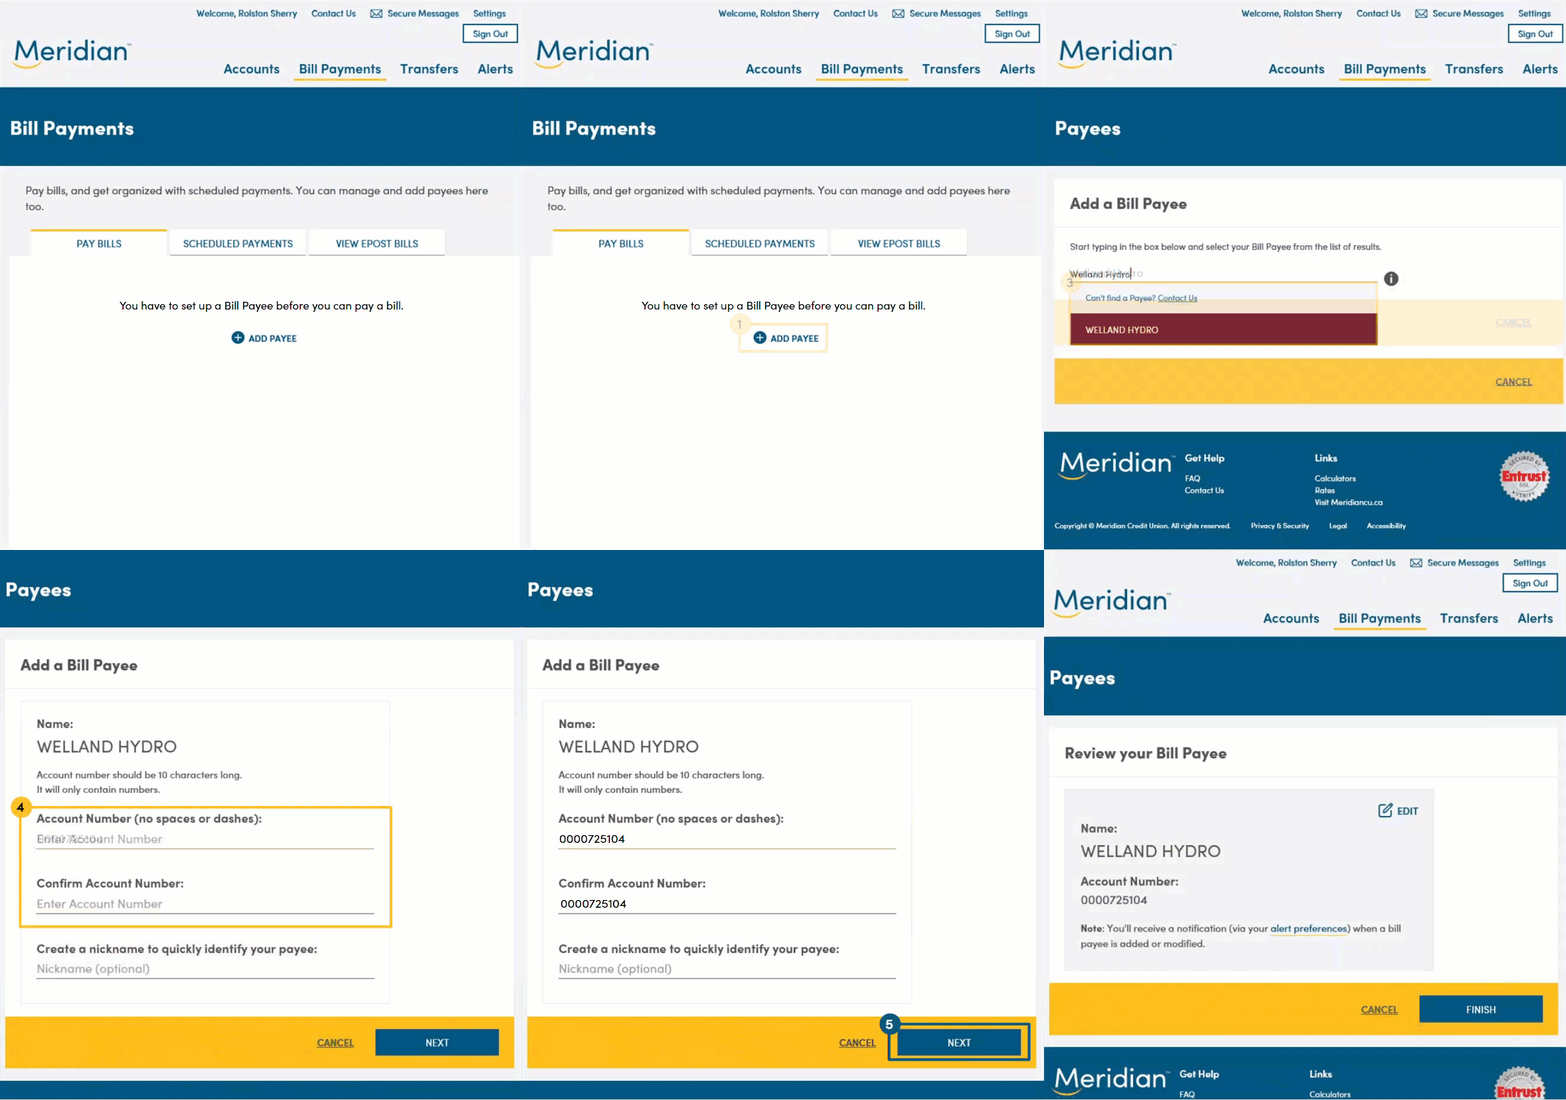
Step 2: Add a payee

To add a payee to your account, first click the Add Payee button.
Search for the Bill Payee you want to add by typing the payee’s name in the search field. As you search, results will populate. When you see the payee you’re looking for, select it from the search results.
Tip: Check your statement to make sure you’ve selected the right payee. Sometimes payees have different or specific names.
If you can’t find a payee in your search, click ‘Contact Us’ for options to get assistance.
Enter your account number under both the ‘Account Number’ and ‘Confirm Account Number’ fields. If you don’t know your account number, check your bill or statement.
Tip: always double check that your account number is correct before adding it. You also have the option to nickname your payee.
When you’re done, click the Next button.
On the next screen, you can review and edit the information for this new payee.
If the information is correct, click the Finish button to add this Bill Payee.
Step 3: Make a one-time bill payment

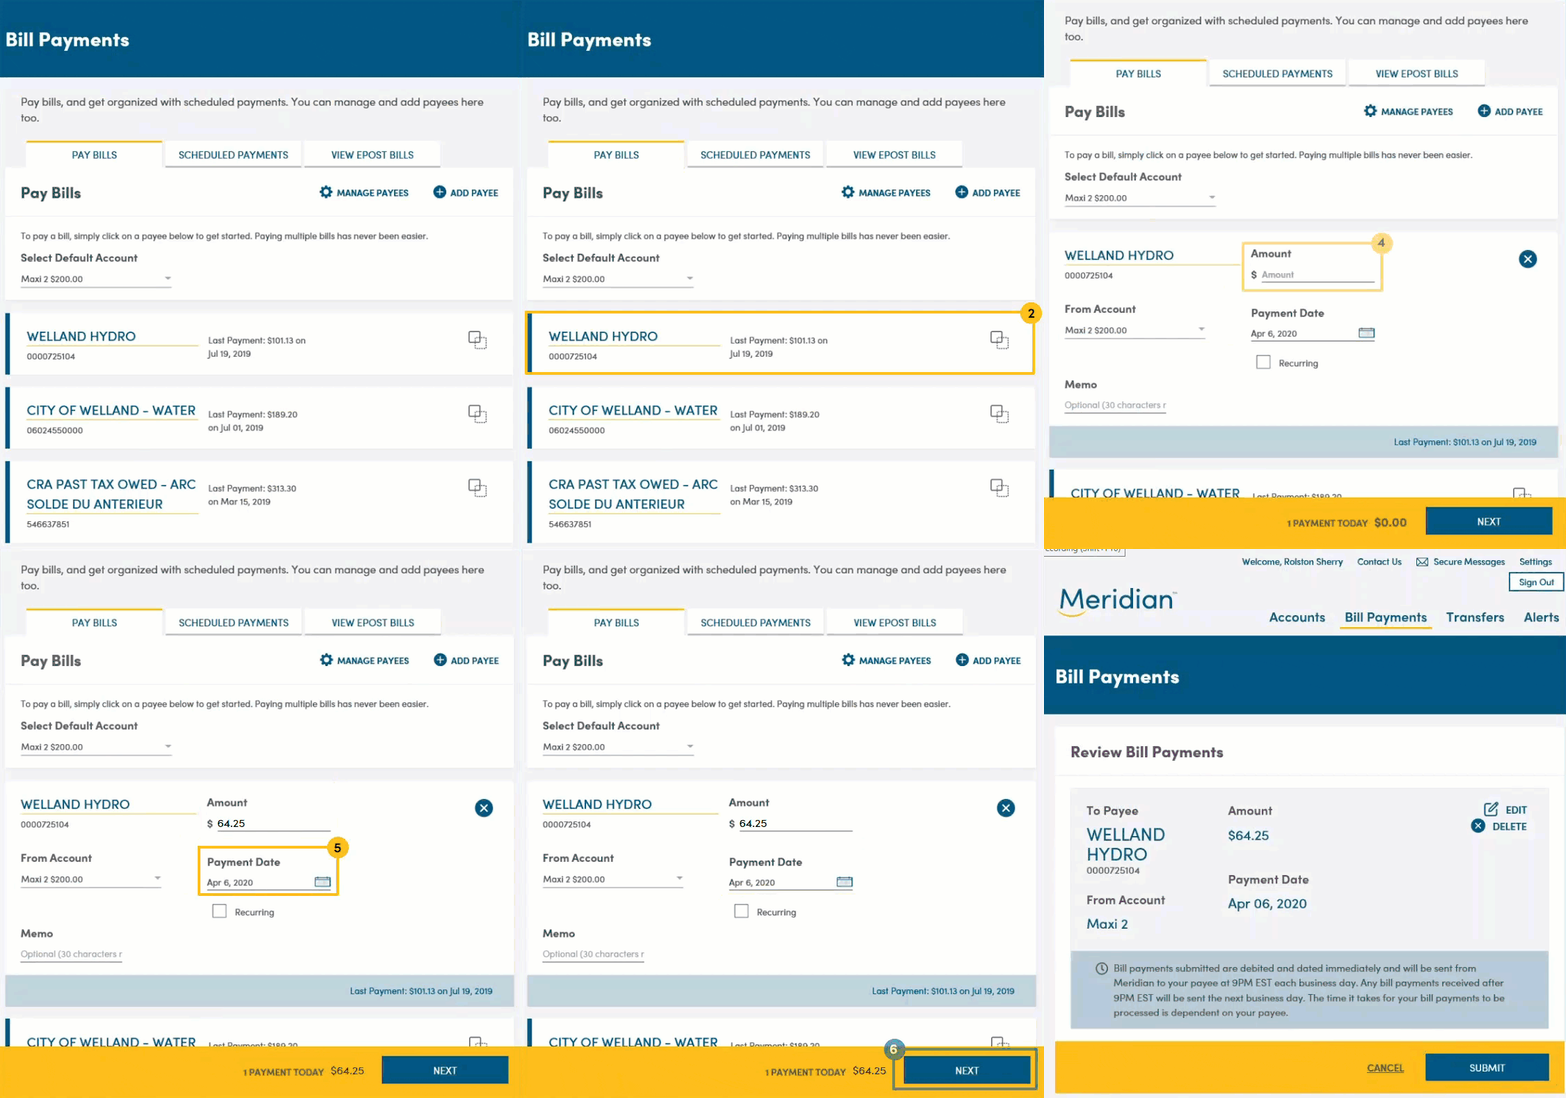
To pay a bill, make sure you are on the Pay Bills tab under the Bill Payments section. To start, select the payee you want to pay from the list on your screen.
Select the account you’d like to pay the bill from using the drop down list under ‘From Account’.
Under ‘Amount’, type in the payment amount of the bill.
Finally, under ‘Payment Date’, select when you want this payment to occur. The default will be set to pay the bill today, but you can click the calendar icon and select a future date for the bill to be paid. You also have the option to add a Memo for the payee. When you’ve input the information, click the ‘Next’ button.
On the next screen, you can review the information you submitted. To finalize the bill payment, click Submit.
Step 4: Set up a recurring bill payment

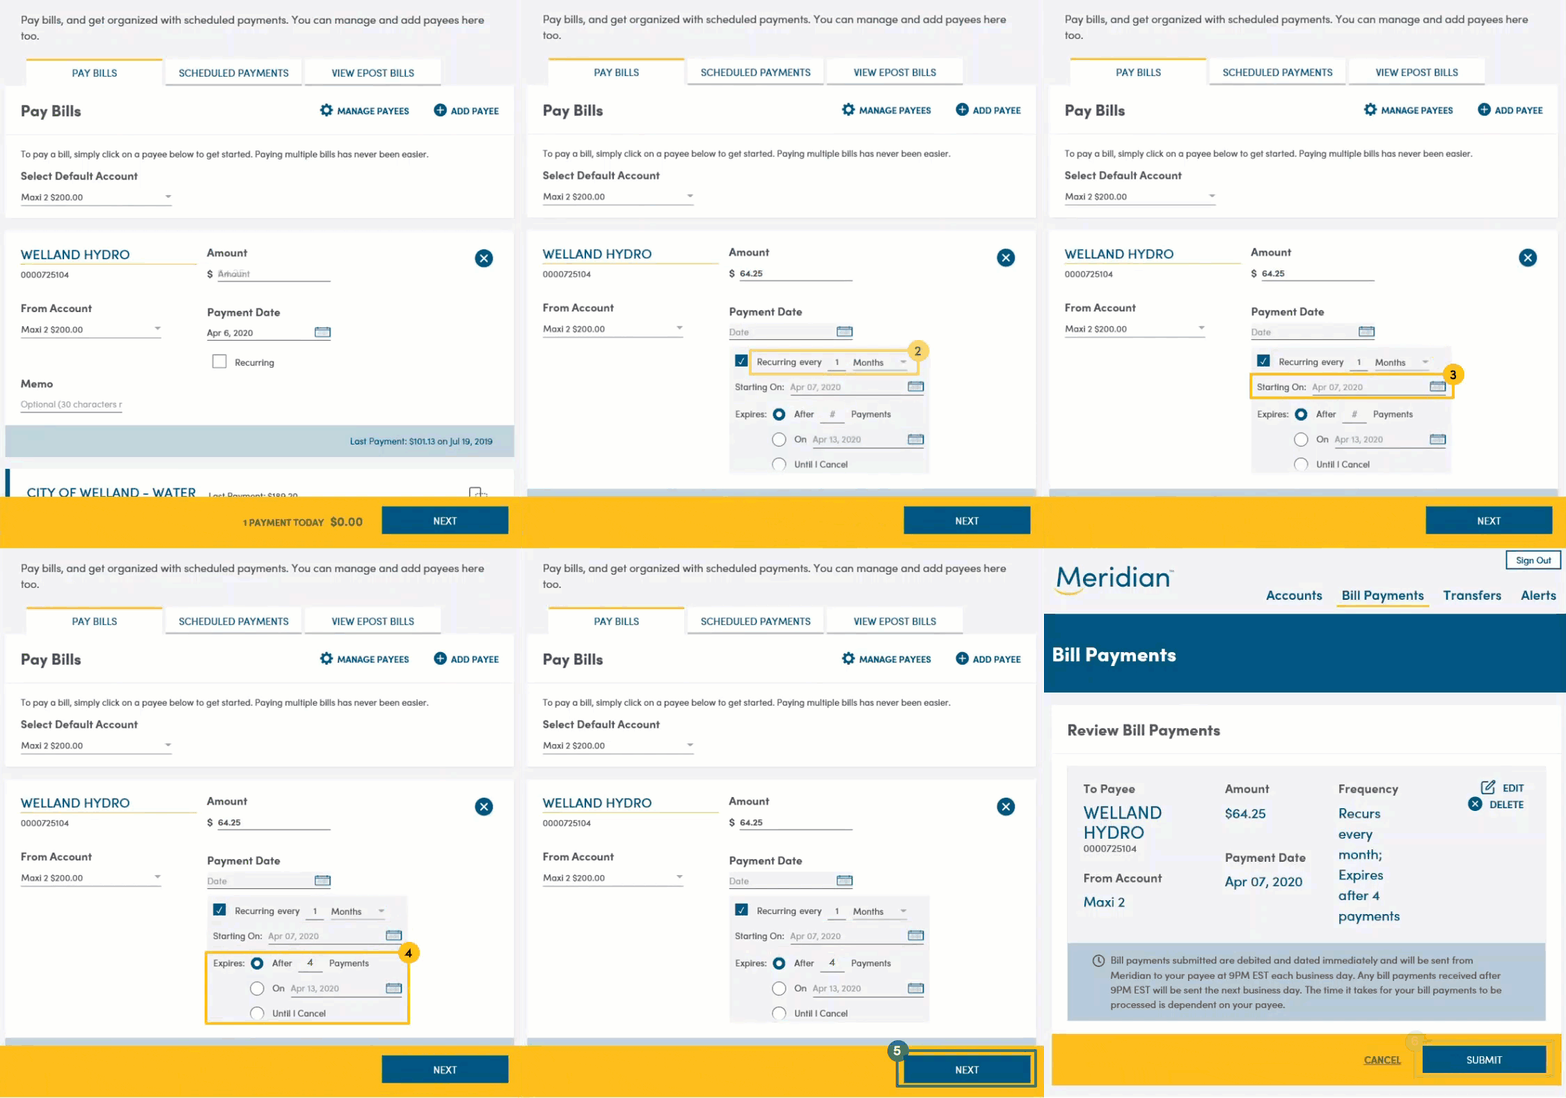
You can schedule recurring bill payments by selecting the ‘Recurring’ option. From here, you’ll set how often the bill payment occurs, when it starts, and when it expires. The expiry can be set after a certain amount of payments, on a certain date, or until you cancel. When you’re ready to schedule the bill payment, click the Next button.
On the next screen, you can review the information you’ve submitted, and edit it or cancel if you wish. If all the information is correct, click the 'Submit’ button to confirm this ongoing bill payment.
Step 5: Manage scheduled and future-dated bill payments

To manage your scheduled and future bill payments, click the Scheduled Payments tab under the Bill Payments section.
To view the details of the scheduled payment, click View. The full details of the payment will be listed here. You can edit the bill by clicking the Edit icon, or cancel it by clicking the Delete icon.